*** 3D Printed
SwitchBoard for Tube Tracer ***
And my Experience Sofar with Tube Curve Tracer
The Story
It's just a
matter of time, but when you have several little stocks of
NOS and
used tubes laying around, you feel the need to see how they test,
compare them, and find the tube that better match.
To do that you need a tube curve tracer: a
circuit that explores the I/V anode curve changing Vgrid / bias point.
Several years ago
I designed one ( you can find the first prototype on this
site)
that unfortunately got lost moving from one house to another.
Actually this was a old build based on a 8088 Pc, with costly
component ( I remeber only the ADC borad cost me more than 100.000
lire!), useful to test onli small signal tubes. But It was one of the
first of its kind and nice to play with.
At the beginning of
2019 , having bought a bounch of 801a tubes in a
joint bargain with friends we had the need to match
them and divide between us. The "quick an dirty solution" was
ti to bulid a simple I-V tester based on a couple of chinese
step Up and and I/V display based on an arduino nano+ADS115 ADC (see
photo below)
This
was of course a basic solution Just
to have a quick check on what I've bought and share.
Just a question of time and I felt the need to move forward
to something that at least build the classical IV cure variing Vg.
I search for something affordable, I found on ebay a French board that
promoted itself like a low cost tube tracer. I bought one but
frankly it was one of the worst choiche I made:
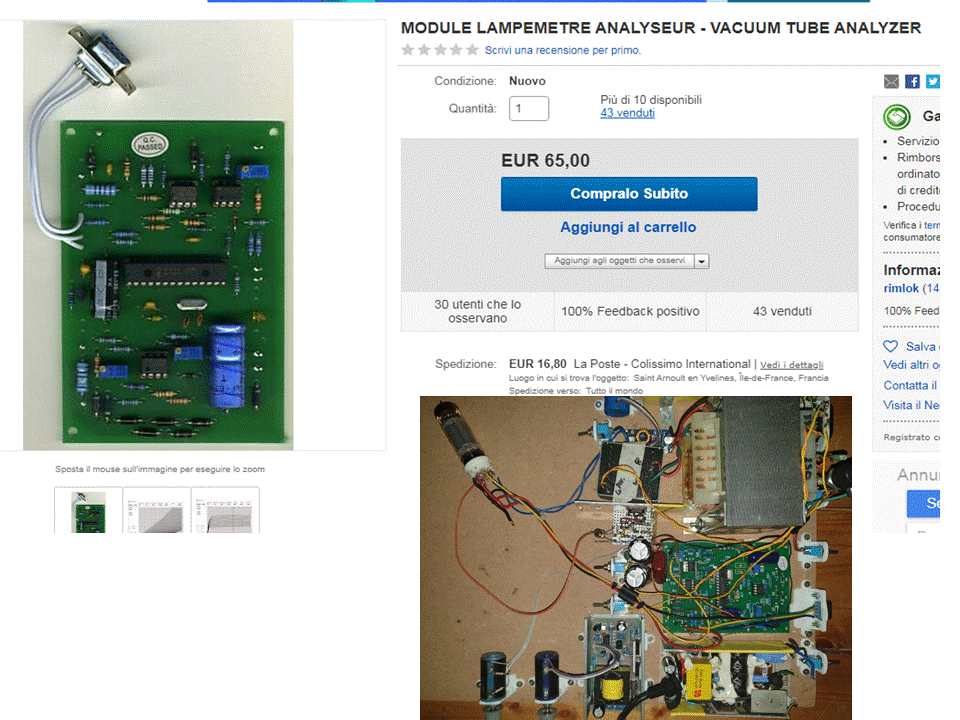
To keep cost down, this board use and old "analogic" approach:
the AC voltage from an anode Xformer (the big one on the right corner,
300Vac output) is cut by a diode and the resulting 300 Vac 50hz pulse is fed to the tube .
The
microcontroller sweep Vg, then mesaures Ia, and does some
ancillary works to display curves and keeping Ia under control.
Simple
enough but beside being poorly flexyble ( fixed number of samples,
fixed Ia levels... ok, I khow when I made the purchase) what
surprise me most between one set of measures and another was that
the tube instead of staying cold, was becoming increasingly hot.
Probably because the AC pulse was still croosing it. The
simple solution to avoid that was to put a switch to cut Va on lampemeter each time a set of measures was ended .
BUT frankly
this was annoyng. And of course we dont want to ruin our precious tubes
with that ugly 50hz 300Va pulse, so this "bad mannered" piece of
hardware was quickly sent away from my tubes.
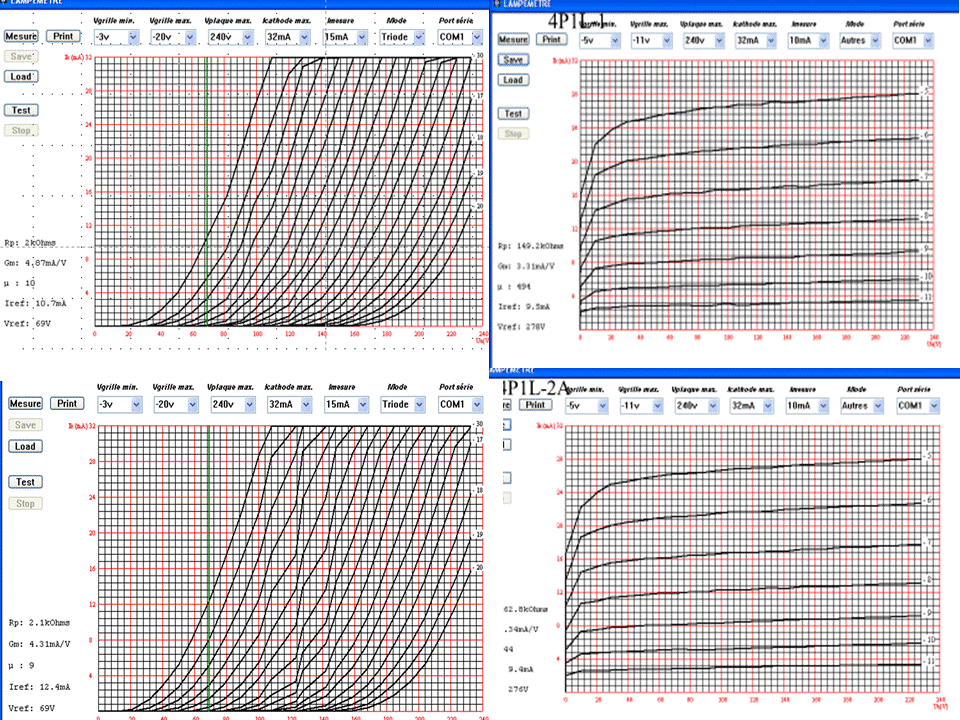
Just for the records here are a couple of measures with Lampemetre on two 4PL1 Tubes (named 01 and 02).
As
you can see (expecially in Tube 02), one
other annoying thing was that the curves sometimes were not parallel and quite "segmented".
Beside low accuracy, this probably was also due to hum Injection or oscillations poorly
tamed by the circuit (always put some more VK200 or ferrite beads in the measuring wires of tube tracers, see also below).
.
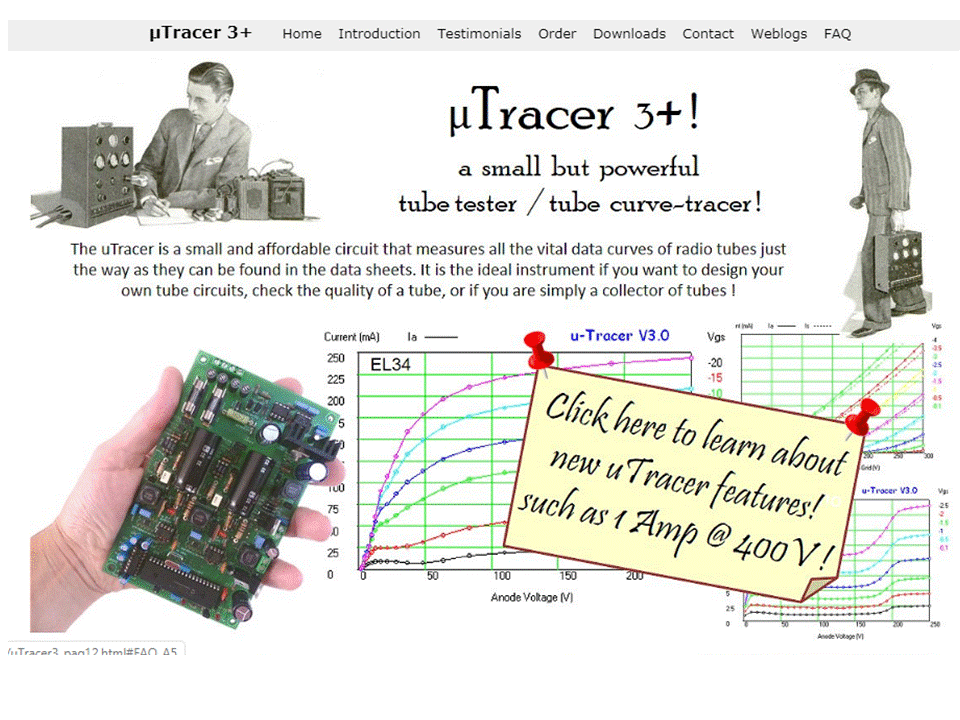
After
some time for thinkering and regaining budget, I decide to give this
project another try an buy a kit of the well known uTracer.
Costruction was a breeze thanks to the iper-detailed manual with plenty of figures and advices how to assemble it.
UTracer uses a charge contolled cap to inject low energy pulse on the
tubes: this guarantees no damage is possible. With that approach you can also explore
hig current bias, above spec point without being afraid of ruin the tube under test.
To
get a comparison of the different quality of the set of curves measured by this tracers, here are the curves for
4p1L (triode mode).
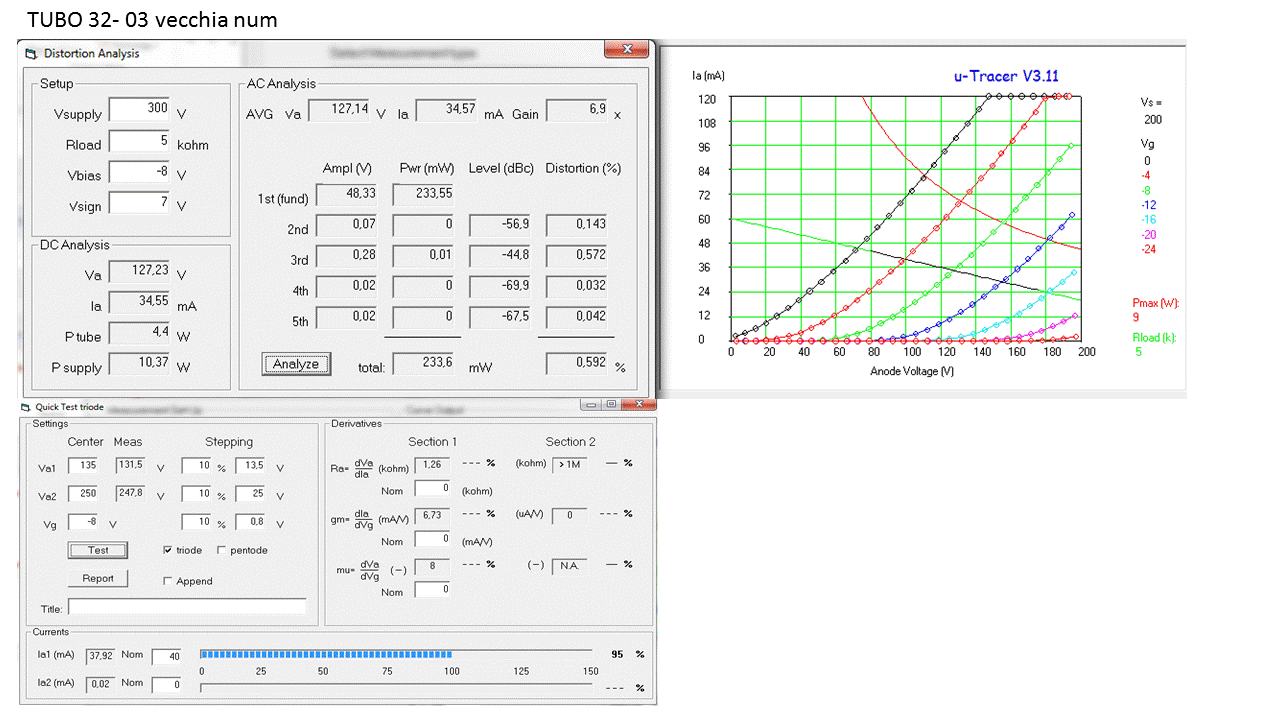
As you can see, the IV curves are nicely parallel with no sign of noise and the program gives lot of useful data, like:
- distortion with an applied Vsupply, Rload , Vbias;
- internal parameters around a preferred bias point( Ra, mu Gm..);
- deviation from datasheet spcified Current in the bias point.
With
the useful feature of "keeping the previus plot" is easy to check for
matches.
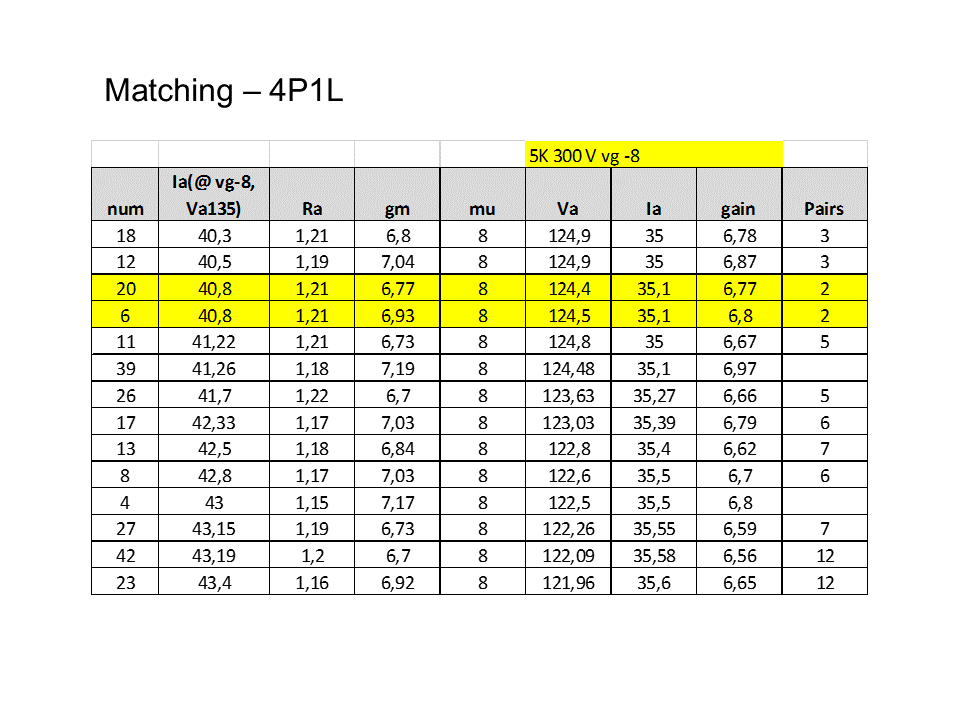
When I do that to keep things simple I normally build a spreadsheet with
the main data around the preferred bias point sorted fot Ia/mu:
This
normally would be enough, but in sake of precision, I check
visually with the curves against a reference tube (03 in the plot):
That's quite a good match ;)
Guessing about the
ideal tube tester, what I miss most in this nice piece of hadware is
Va to go beyond 400V, rising to 900V-1000V : this could be useful to test
medium voltage tubes ( 801a ) and high voltage tubes ( 845, 211). Of
corse Vg accordingly shuld go further to -150V at least.
Also a direct output of Spice /LT spice models could be nice for simulation-oriented DIYers.
There
are some examples out there (first in mind the old "Sophia" and the
more recent e-tracer). As a rule they are ready build machines so the
cost is way too hig and not affordable for the average tube DIY
enthusiast.
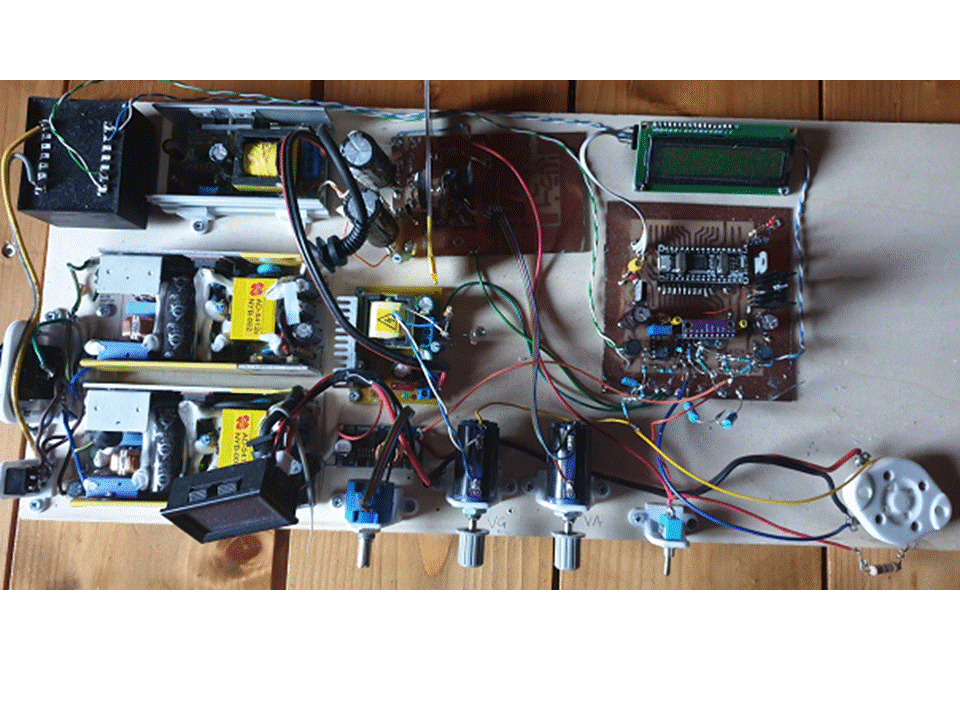
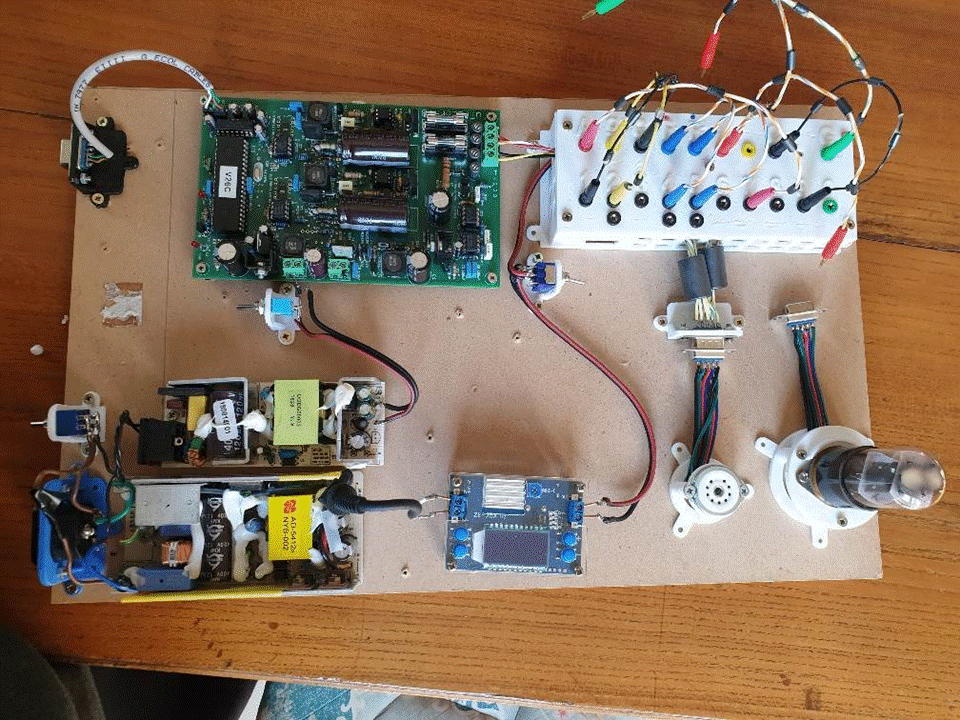
Pictures of
My Build & 3D printed parts
Here is my buld.
This piece of hardware is now my main way to match tubes and guess on the way they will behave.
As
you can see on the right-bottom there are two PC SMPS, one for the
uTracer (19V) and anoter one for the tube heater (12V -4,5A) .
The 3 switches do this:
- Mains On/off
- uTracer On/off (useful when things get "stuck".)
- filament
PS Source: uTRacer or external PS ( recently I stopped using the
internal Filament PS so no more connection to the board)
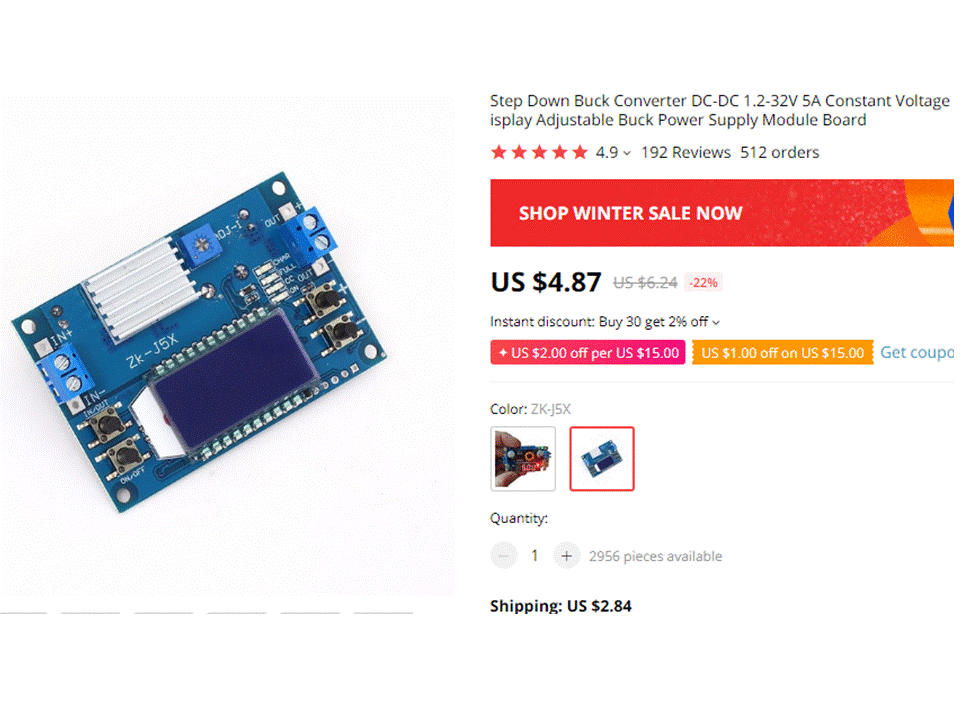
As tube heater PS I use this little step down that has one disadvantage (no slow start) but two advantages:
- you can measure Direct Heating tubes with no fear
- a little display showing voltage and current.
Having
the possibility of checking filament current intake is quite useful to se the
diffrence in the heater costruction of each tube in the same batch and visually check when the filament is
effectively "warm" ( current dont' change in the last 30 secs..).
One
nice thing to have when you have a tube tracer is a way to quickly
switch the test leads Va, Vg, Vk Filaments, for different tubes and
tube sockets. So I build this quick "exchange board" .
f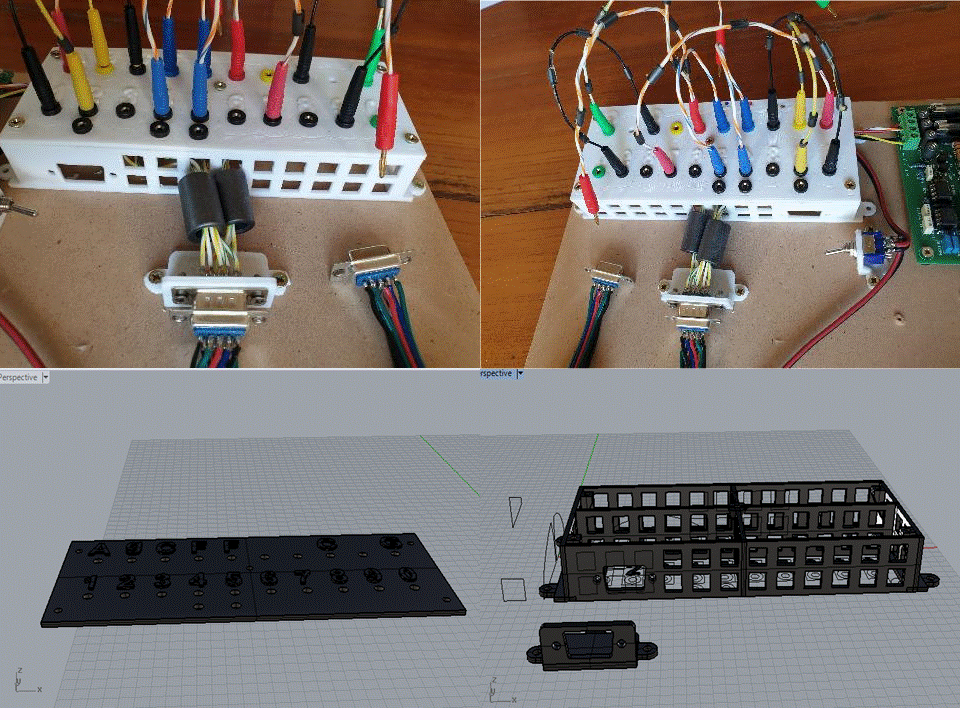
The
boards is on the top left and uses 2mm banana female plugs connected
with a bunch of patch wires with banana males in each termintion .
Remember to put ferrite bead in each patch wire (4 at least) evenly spaced and kept in position with glue.
The board uses a common RS 232 to change between different tube sockets. This is to keep everithing compact and flexible.
Actually
I feared that with high filament current tubes ( i.e. 300B, 2a3) there
could be problems with the RS232 contacts, but till now all seems
to work well.
Download
Tube Prototyping 3D printed parts
Here are the
links to dowload the *.STL files "ready to print" (of course you need
slicing with cura or repetier: I print with 0.2mm slicing with 30%
infill) . Please tell me if you have something better: sharing is nice
and "environmentally friendly" :)
NOTE:
I've also published all the above parts on THINGIVERSE just
search "agalavotti"
That's all
folks (for now)
Listen, have a happy new year and ENJOY!
Back
to my homepage